Built in Closet Project Step 1
The first thing I did for this project was to take measurements.
With the measurements I made a couple sketches of how I
wanted to arrange the closet. Where to place the shelves, and
where to place the hanging rods for the new design. I made
2 different sketches, and decided to go with the second one.
I went to the hardware store to get prices on the materials that
I would need, and found that I could use MDF as the shelving
material which I have used before for parts of a cabinet that I
designed and built.
I used the measurements that I had taken to make a cut list, and
had the Hardware store make all the initial cuts to avoid having
to transport 8 foot lengths of material. I spent $72 on my first
visit, and left with almost all the material that I would need to
get started.
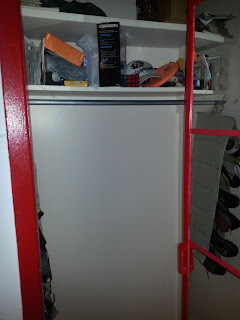
On the first day of the build I started be emptying the closet of
all the clothes and items that I had stored on the floor of my
closet. The upper shelves were left in place as they were out
of the way.

With the floor area cleaned out I was ready to start to build the
bottom shelf and storage area for some of my LP's and suitcase.
I put in a divider to separate the two compartments, and painted
the components black to match the shelving pieces of MDF that
I planned to use for the rest of the shelves.

I also used a 3/8"round over bit to shape the front of the bottom shelf.

To install the divider, I screwed in a small piece of pine into the studs, This was to act as a lower rear shelf bracket, as well as the upper support for the divider.

Then I tacked the divider into place with a nail gun.

I also cut a piece of MDF the same height as the divider, to act as the front support for my suitcase storage "box." This was also tacked into a shelf support against the wall. I added a piece of 1" pine to the inside edge to accept 3 screws from the divider side which would give more support than the nail gun could offer.


Once I had the supports in place I was able to place the bottom shelves on top. Here is how the base shelves fit into place so that I could access my record collection on the left, and store a suitcase on the right.

This is the last photo showing the suitcase underneath the bottom self.

In the next section, I will show the shelving system I designed with the split level hanging rods. Unfortunately, I did not take photos during the build.. After I painted the walls dark blue, it was difficult to photograph.
Thank you for viewing my post here! I did not find too many sites for DYI closet systems. Any and all comments are welcome, as well as links to other useful sites that might be of help to someone trying to build their own closet!
With the measurements I made a couple sketches of how I
wanted to arrange the closet. Where to place the shelves, and
where to place the hanging rods for the new design. I made
2 different sketches, and decided to go with the second one.
I went to the hardware store to get prices on the materials that
I would need, and found that I could use MDF as the shelving
material which I have used before for parts of a cabinet that I
designed and built.
I used the measurements that I had taken to make a cut list, and
had the Hardware store make all the initial cuts to avoid having
to transport 8 foot lengths of material. I spent $72 on my first
visit, and left with almost all the material that I would need to
get started.
On the first day of the build I started be emptying the closet of
all the clothes and items that I had stored on the floor of my
closet. The upper shelves were left in place as they were out
of the way.


With the floor area cleaned out I was ready to start to build the
bottom shelf and storage area for some of my LP's and suitcase.
I put in a divider to separate the two compartments, and painted
the components black to match the shelving pieces of MDF that
I planned to use for the rest of the shelves.

I also used a 3/8"round over bit to shape the front of the bottom shelf.

To install the divider, I screwed in a small piece of pine into the studs, This was to act as a lower rear shelf bracket, as well as the upper support for the divider.

Then I tacked the divider into place with a nail gun.

I also cut a piece of MDF the same height as the divider, to act as the front support for my suitcase storage "box." This was also tacked into a shelf support against the wall. I added a piece of 1" pine to the inside edge to accept 3 screws from the divider side which would give more support than the nail gun could offer.


Once I had the supports in place I was able to place the bottom shelves on top. Here is how the base shelves fit into place so that I could access my record collection on the left, and store a suitcase on the right.

This is the last photo showing the suitcase underneath the bottom self.

In the next section, I will show the shelving system I designed with the split level hanging rods. Unfortunately, I did not take photos during the build.. After I painted the walls dark blue, it was difficult to photograph.
Thank you for viewing my post here! I did not find too many sites for DYI closet systems. Any and all comments are welcome, as well as links to other useful sites that might be of help to someone trying to build their own closet!


Comments
Post a Comment